- Coating Thickness Gauge
- X Ray Flaw Detector
- Magnetic Particle Inspection(MPI)
- Wire rope detector
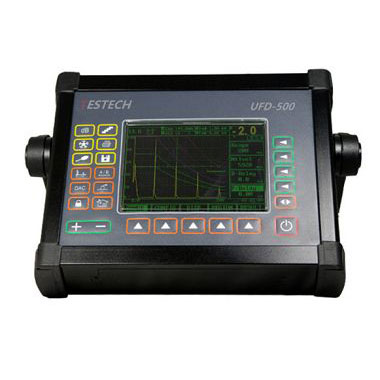
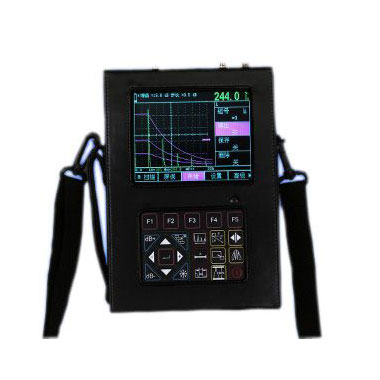
- Digital Ultrasonic Flaw Detector
- Ultrasonic Thickness Gauge
- Holiday Detector
- Concrete Testing Equipment
- Surface Roughness Tester
- Eddy Current Electric Conductivity Meter
- Profile Projector
- Hardness Tester
- Industrial Endoscope
- Underground Pipeline leak Detector
- Microscope
|
Measuring Range |
1.0-1,200mm |
|||||||
|
Measuring Resolution |
0.01mm(< 100mm)/ 1mm(>100mm) |
|||||||
|
Velocity |
500~20,000m/s( 20 fixed velocities) |
|||||||
|
Delay |
Display Delay: -20~3400us resolution: 0.1us Probe Delay : 0~99us resolution: 0.01us |
|||||||
|
Auto Calibration |
Velocity Calibration& Probe Delay Calibration |
|||||||
|
Linear Error |
Horizontal linearity error≤0.1% Vertical linearity error ≤3% |
|||||||
|
Dynamic Range |
≥36dB |
|||||||
|
Sensitivity Leavings |
≥64dB 200mm 2 flat-bottomed hole |
|||||||
|
Dimension (mm) |
240*180*50 |
|||||||
|
Weight |
1.9Kg(including battery pack) |
|||||||
|
Working Environment |
Temperature:-20°C~70°C, Humidity:5%~90%, |
|||||||
|
Pulse |
150V Negative Pulse |
Damping :50/150/400Ω |
||||||
|
Pulse repetition frequency PRF could be adjusted |
||||||||
|
Receiver |
Measuring mode:Peak /Verge |
Bandwidth:0.3~1 / 0.5~4 /2~15MHz |
||||||
|
Detector Pattern: RF/Full-Wave/Positive /Negative half- wave |
||||||||
|
Testing Mode: pulse-Echo/Pulser-Receiver/transmission |
||||||||
|
Gain :0 to 110dB Customers define steps 0/0.2/0.5/1/2/6/12 |
||||||||
|
Display |
LCD |
TFT Color. Display,5 options for variable brightness. |
||||||
|
GUI Theme |
Simple/Classical/Gray/Bright Light/ Dark Light |
|||||||
|
Screen Update Rate |
≥60 Hz |
|||||||
|
Gate/Measuring/ Alarm |
Gate |
Two Separated Gates A/B |
||||||
|
Value Display |
5 value display areas, one of them is mainly area. Chosen measuring content SA/SB/DA/DB/PA/PB/A%A/A%B/dBtA/dBtB/dBrA/dBrB/SBA/DBA/PBA/LA/LB |
|||||||
|
Alarm |
Thickness Value Threshold Alarm ,Separated Gate Alarm Logically |
|||||||
|
Memory |
Channelparameters: 20 groups |
A Scan: 2000 groups |
||||||
|
Thickness Logging: 200,000 data sets ,liner |
Wave Video: 5 min |
Reference Wave:4 |
||||||
|
Input/Output |
Probe Cable: LEMO/BNC |
Communication :RS232 |
||||||
|
Area |
Language: Chinese /English |
Unit: mm/inch |
Clock: Date and Time |
|||||
|
Power Source |
Battery:High power lithium battery ,capable of preventing over-charge and over-discharge |
|||||||
|
Power Indicator:Proportional battery gauge indicating remaining operation time |
||||||||
|
Working Time:Continuous working over 10 hours |
||||||||
|
Power adapter:Input 100~240V/50~60Hz output 9VDC/4A |
||||||||
|
High Grade |
USB for Storage |
3 kinds of data report, screenshot , wave, thickness value |
||||||
|
Gate: |
Analysis the details of the wide gate area |
|||||||
|
B Scan: |
Thickness/ Shape scan Gray/Color board Design |
|||||||
|
Freezing Curve |
Yes |
|||||||
|
Feature Indicator |
Measuring of the sound distance wave front & amplitude |
|||||||
|
CSC Curve Calibration |
Value correction according to probe angle, pieces thickness and curvature diameter |
|||||||
|
Lock |
Single menu independently lock to avoid system adjust related data; |
|||||||
|
Data group could lock to avoid wrong delete |
||||||||
|
Screen saver |
Standby/Character/Power Off |
|||||||
|
Equivalent Curve |
DAC curve |
Recording 30 calibration points; auto gain; any order calibration; two correction matter calibration/edit ; considering of material attenuation and surface saving factor; 5 estimate curves of adjusted gain, comply to JIS&API standard |
||||||
|
DGS Curve |
DGS Curve fits to three references, includes flat bottomed ,flat-bottomed hole, through holes; considering of material attenuation and surface saving factor, estimating flaw matter; equivalent size/equivalent gain/percentage; |
|||||||
|
Standard Configuration |
Main Body Straight probe Angle probe Probe Cable Power Adaptor Coupling Paste Battery Carrying case Instruction manual |
|
||||||
|
Optional Accessories |
Interface Gate:Applied when flaw detector in a environment which has medium, e.g water |
|||||||
|
Printer:TP serial printer , 3 data report: screen shot , wave , thickness value |
||||||||
|
Huge capacity battery: Continuous working time: over 20 hours |
||||||||


